Cuisinart Ice Cream Machine Instructions: A Comprehensive Guide
Discover delightful homemade frozen treats! This guide offers detailed instructions‚ recipes‚ and troubleshooting for your Cuisinart ice cream maker‚ ensuring sweet success․
Understanding Your Cuisinart Ice Cream Maker
Your Cuisinart ice cream maker is designed for creating delicious frozen desserts at home‚ offering a fantastic alternative to store-bought options․ These machines utilize a freezing bowl that requires pre-freezing – typically for 16-24 hours – to achieve the correct consistency․ The motor then churns the ice cream mixture‚ gradually freezing it while incorporating air‚ resulting in a smooth and creamy texture․
Different models exist‚ ranging in capacity (typically 1․5 to 4 quarts) and features․ Some include built-in compressors‚ eliminating the need for pre-freezing the bowl‚ while others offer automatic shut-off functions․ Familiarizing yourself with your specific model’s features‚ as detailed in the instruction booklet‚ is crucial for optimal performance․ Understanding the interplay between the freezing bowl‚ the churning mechanism‚ and the ingredients is key to consistently producing high-quality ice cream‚ frozen yogurt‚ or sorbet․
Components and Parts Identification
A typical Cuisinart ice cream maker consists of several key components․ The freezing bowl‚ often double-walled and filled with a freezing liquid‚ is essential for the initial freezing process․ The outer housing contains the motor and provides structural support․ The mixing blade‚ also known as the dasher‚ churns the mixture and incorporates air․ A transparent lid allows you to monitor the freezing process without interrupting it․
Additionally‚ you’ll find a motor base with an on/off switch and sometimes a speed control․ Some models include a recipe booklet and measuring tools․ It’s vital to correctly identify each part before assembly․ Refer to your model’s diagram in the manual to ensure proper placement and function․ Understanding each component’s role will aid in assembly‚ operation‚ and ultimately‚ successful ice cream making․ Familiarity prevents errors and ensures longevity of your appliance․
Safety Precautions Before First Use
Before operating your Cuisinart ice cream maker‚ prioritize safety․ Always read the entire instruction manual thoroughly to understand all warnings and guidelines․ Ensure the appliance is placed on a stable‚ level surface away from water sources․ Inspect the power cord for any damage; do not use if frayed or damaged․ Never immerse the motor base in water or other liquids․

Keep hands and utensils away from the moving mixing blade during operation․ Supervise children closely when the machine is in use․ Do not attempt to disassemble or repair the machine yourself; contact qualified service personnel for assistance․ The freezing bowl contains a frozen liquid; avoid contact with skin to prevent frostbite․ Proper grounding is crucial to prevent electrical shock․ Following these precautions ensures safe and enjoyable ice cream making․

Preparing for Ice Cream Making
Success hinges on a thoroughly frozen bowl and perfectly prepared ingredients! Follow these steps for optimal results‚ ensuring a creamy‚ delicious frozen dessert․
Freezing the Bowl: Essential Steps
Achieving the ideal ice cream texture relies heavily on properly freezing the Cuisinart ice cream maker’s bowl․ Ensure it’s completely frozen before beginning the churning process – typically a minimum of 16-24 hours in the freezer is required․ The bowl must be placed directly on a freezer shelf‚ avoiding placement on the door or near the defrost vent‚ as temperature fluctuations can hinder complete freezing․
Before each use‚ double-check that the bowl is solid and feels completely frozen to the touch․ A partially frozen bowl will result in a soft‚ soupy mixture instead of creamy ice cream․ It’s crucial to avoid any interruptions during the freezing period; repeated opening of the freezer door can compromise the bowl’s temperature․ Remember to dry the bowl thoroughly before placing it in the freezer to prevent ice crystal formation․ Consistent freezing is key to a delightful homemade ice cream experience!
Ingredient Preparation Guidelines
For optimal results with your Cuisinart ice cream maker‚ meticulous ingredient preparation is essential․ Begin with fresh‚ high-quality ingredients for the best flavor․ Dairy-based mixtures should be thoroughly chilled – ideally‚ refrigerate the base for at least two hours‚ or even overnight‚ before churning․ This ensures faster freezing and a smoother texture․
When using fruit‚ ensure it’s ripe and pureed or finely chopped to prevent large ice crystals․ Sugar should be fully dissolved in the liquid base before churning; stirring vigorously or gently heating can aid this process․ Avoid adding chunky ingredients like cookies or chocolate chips directly to the machine; incorporate them during the last few minutes of churning․ Proper ingredient temperature and consistency are vital for achieving the perfect scoopable consistency․ Remember to follow recipe instructions carefully for precise measurements․
Recipe Considerations: Dairy vs․ Non-Dairy
When utilizing your Cuisinart ice cream maker‚ understanding the differences between dairy and non-dairy recipes is crucial․ Dairy-based ice creams generally churn faster and achieve a creamier texture due to the fat content․ However‚ non-dairy alternatives‚ like those using coconut milk or almond milk‚ require careful attention․
Non-dairy bases often freeze harder‚ resulting in a less smooth consistency․ To counteract this‚ consider adding stabilizers like guar gum or xanthan gum‚ following recipe guidelines precisely․ Increasing the fat content with ingredients like coconut cream can also improve texture․ Adjusting sugar levels may be necessary‚ as non-dairy milks can have varying sweetness․ Always ensure the non-dairy base is thoroughly chilled before churning‚ potentially even longer than dairy mixtures․ Experimentation is key to perfecting your favorite non-dairy frozen desserts!

Operating Instructions: Step-by-Step
Begin by assembling the frozen bowl and dasher․ Pour in your chilled mixture‚ then secure the lid․ Plug in and churn for optimal results!
Assembling the Machine Correctly
Proper assembly is crucial for efficient ice cream making․ First‚ ensure the freezer bowl is thoroughly frozen – typically at least 24 hours is recommended․ Once frozen‚ carefully place the bowl into the ice cream maker base‚ aligning it correctly to ensure a secure fit․ Next‚ insert the dasher assembly into the bowl․ The dasher‚ with its paddle‚ is responsible for churning and incorporating air into the mixture․
Pay close attention to the dasher’s orientation; it should fit snugly but still rotate freely․ Secure the lid onto the base‚ ensuring it clicks into place․ The lid often has a cutout for adding ingredients during the churning process․ Before plugging in the machine‚ double-check that all components are properly aligned and locked․ A misaligned assembly can prevent the machine from operating correctly or even cause damage․ Refer to your model’s specific diagram in the instruction booklet for visual guidance․
Adding the Ice Cream Mixture
With the machine assembled and the lid securely in place‚ it’s time to introduce your prepared ice cream mixture․ Locate the ingredient spout on the lid – this allows for additions during churning․ Gently pour the chilled ice cream base into the freezer bowl through this opening․ Avoid overfilling; leave at least one inch of space at the top of the bowl to accommodate expansion during the freezing process․
Overfilling can lead to spillage and prevent proper churning․ Once the mixture is added‚ immediately turn on the machine․ The dasher will begin to rotate‚ initiating the freezing process․ If adding mix-ins like chocolate chips‚ fruit‚ or nuts‚ do so during the last few minutes of churning‚ adding them slowly through the ingredient spout․ This ensures they are evenly distributed without becoming overly crushed․ Monitor the mixture’s consistency as it thickens․
The Churning Process: Duration and Monitoring
Allow the Cuisinart ice cream maker to churn for approximately 20-30 minutes․ The exact duration will depend on the recipe‚ the ambient temperature‚ and the initial temperature of your mixture and bowl․ Observe the mixture closely; it will gradually thicken and resemble soft-serve ice cream․ The dasher will become more difficult to turn as the mixture freezes‚ indicating progress․
Avoid interrupting the churning process prematurely‚ as this can result in a grainy texture․ However‚ if the motor seems to be straining excessively‚ stop the machine‚ unplug it‚ and check the mixture’s consistency․ If it’s frozen solid‚ the process is complete․ Once churning is finished‚ the machine may automatically shut off‚ or you may need to turn it off manually․ Immediately transfer the ice cream to a freezer-safe container for hardening․

Recipes and Flavor Ideas
Explore a world of frozen delights! From classic vanilla to exciting variations‚ these recipes will inspire your creativity and satisfy every sweet craving effortlessly․
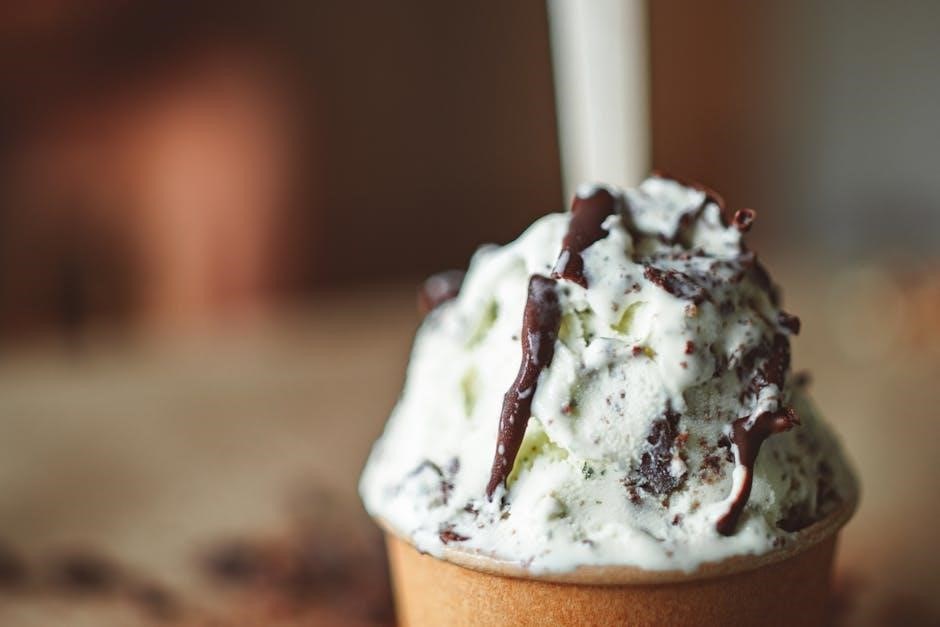
Classic Vanilla Ice Cream Recipe
Yields: Approximately 1 quart
Prep time: 20 minutes
Freeze time: 20-25 minutes (plus bowl freezing time)
Ingredients:
- 2 cups heavy cream
- 1 cup whole milk
- ¾ cup granulated sugar
- 1 tablespoon vanilla extract
- Pinch of salt
Instructions:
- In a medium bowl‚ whisk together the heavy cream‚ whole milk‚ sugar‚ vanilla extract‚ and salt until the sugar is completely dissolved․
- Chill the mixture thoroughly for at least 30 minutes – this ensures a smoother texture․
- Pour the chilled mixture into the frozen Cuisinart ice cream maker bowl․
- Process according to your machine’s instructions‚ typically for 20-25 minutes‚ or until it reaches a soft-serve consistency․
- Transfer to an airtight container and freeze for at least 2 hours for a firmer texture․

Tip: For a richer flavor‚ use vanilla bean paste instead of extract!
Chocolate Ice Cream Variations
Elevate your chocolate experience! Begin with the classic vanilla base‚ then introduce cocoa powder (¾ cup for rich chocolate) during the initial mixing stage․ For a decadent dark chocolate version‚ incorporate 4 ounces of melted‚ cooled dark chocolate․
Chocolate Chip Delight: Gently fold in ½ cup of mini chocolate chips during the last 5 minutes of churning․ Mint Chocolate Chip: Add ½ teaspoon of peppermint extract and ½ cup of mini chocolate chips․
Mocha Magic: Dissolve 2 tablespoons of instant coffee granules in the warm milk before chilling․ Salted Caramel Chocolate: Swirl in ¼ cup of salted caramel sauce after churning․ Remember to adjust sugar levels based on added ingredients․ Experiment with different cocoa percentages for varying intensity!
Frozen Yogurt and Sorbet Recipes
Expand your frozen dessert horizons! For creamy frozen yogurt‚ substitute milk with plain or flavored yogurt (Greek yogurt yields a thicker texture)․ Use a ratio of 3 cups yogurt to 1 cup cream for optimal results․ Add fruit purees or extracts for flavor – strawberry‚ peach‚ or vanilla are excellent choices․
Refreshing Sorbets: Sorbets require a simple syrup base (equal parts sugar and water‚ heated until dissolved‚ then cooled)․ Blend 2 cups of fruit puree with 1 ½ cups of simple syrup․ Lemon Sorbet: Use lemon juice and zest․ Raspberry Sorbet: Utilize fresh or frozen raspberries․
Mango Sorbet: Blend ripe mango chunks with simple syrup․ Remember sorbets churn faster than ice cream; monitor closely to prevent a grainy texture․ Adjust sweetness to your preference!

Maintenance and Cleaning
Ensure longevity by properly cleaning your Cuisinart machine! Disassemble‚ wash parts with warm‚ soapy water‚ and store carefully to prevent damage or odors․
Disassembling the Machine for Cleaning
Before initiating the cleaning process‚ always unplug your Cuisinart ice cream maker from the power outlet․ This is a crucial safety precaution to prevent accidental operation during disassembly․ Begin by removing the freezer bowl; gently twist and lift it away from the machine base․ Next‚ detach the mixing paddle – typically‚ a simple pull upwards will suffice‚ though some models may require a slight twisting motion․
Carefully remove the dasher assembly‚ noting how it connects to the motor shaft․ The lid should then be easily removed․ Inspect each component for any lingering ice cream residue․ It’s important to disassemble completely to ensure thorough cleaning and prevent bacterial growth․ Remember to keep all small parts together to avoid misplacement during reassembly․ A complete breakdown allows for effective sanitation of every area that comes into contact with your delicious frozen creations․
Proper Washing Techniques for Each Part
Wash all removable parts – the bowl‚ paddle‚ dasher‚ and lid – in warm‚ soapy water after each use․ Avoid abrasive cleaners or scouring pads‚ as these can damage the surfaces․ The freezer bowl is often recommended to be hand-washed only; check your model’s specific instructions․ The paddle‚ dasher‚ and lid are generally dishwasher-safe‚ but again‚ confirm with your manual․
Rinse thoroughly to remove all traces of soap․ Pay close attention to crevices where ice cream may accumulate․ Ensure the dasher assembly is completely clean‚ as this area frequently harbors residue․ Dry all parts completely before reassembling․ Never immerse the motor base in water; simply wipe it down with a damp cloth․ Proper cleaning prevents flavor contamination and ensures the longevity of your Cuisinart ice cream maker․
Storage Instructions to Prevent Damage
Proper storage is crucial for maintaining your Cuisinart ice cream maker’s performance․ Before storing‚ ensure all parts are completely clean and dry to prevent mold or mildew․ The freezer bowl must be thoroughly dried before being stored in the freezer; moisture can cause ice crystals to form and potentially damage the bowl’s interior․
Store the motor base in a cool‚ dry place‚ away from direct sunlight and extreme temperatures․ Avoid stacking heavy items on top of the machine‚ as this could cause damage․ The paddle‚ dasher‚ and lid can be stored together in a plastic bag or container to keep them organized and protected․ Consider storing the instruction manual with the machine for easy reference․ Following these guidelines will help ensure your ice cream maker remains in excellent condition for years to come․

Troubleshooting Common Issues
Resolve freezing‚ power‚ or mixture problems quickly! This section provides solutions for common Cuisinart ice cream maker issues‚ ensuring smooth operation and delicious results․
Ice Cream Not Freezing Properly

If your ice cream mixture isn’t freezing‚ several factors could be at play; First‚ ensure the freezing bowl is thoroughly frozen – ideally‚ at least 24 hours is recommended․ Confirm the bowl is level during operation; an uneven surface can hinder the churning process․
Check that the dasher (the paddle) is correctly assembled and rotating freely․ A poorly fitted dasher won’t effectively distribute the cold․ Also‚ verify the mixture’s temperature; it should be well-chilled before adding it to the machine․
Consider the recipe itself․ High sugar content or insufficient fat can affect freezing․ Avoid overfilling the bowl‚ as this reduces efficiency․ Finally‚ ambient room temperature plays a role; warmer environments require longer churning times․ If issues persist‚ re-freeze the bowl and try again‚ ensuring all components are properly aligned․
Machine Not Turning On
When your Cuisinart ice cream maker fails to power on‚ begin with the basics․ Verify the unit is securely plugged into a functioning electrical outlet․ Test the outlet with another appliance to confirm it’s delivering power․ Inspect the power cord for any visible damage – frays‚ cuts‚ or exposed wires – and do not use it if compromised․
Check the machine’s on/off switch‚ ensuring it’s fully engaged․ Some models have a reset button; consult your manual for its location and instructions․ Ensure the dasher is properly seated within the bowl; a misaligned dasher can sometimes trigger a safety mechanism preventing operation․
If the problem persists‚ the motor may have overheated․ Allow the machine to cool down completely before attempting to restart it․ If none of these steps resolve the issue‚ contact Cuisinart customer support for assistance‚ as internal components may require professional attention․
Dealing with a Frozen Mixture
If your ice cream mixture freezes solid before reaching the desired consistency‚ several factors could be at play․ First‚ ensure the bowl is thoroughly frozen – a minimum of 24 hours is generally recommended․ Confirm the mixture was cold before initiating the churning process; room temperature liquids require longer churning times and are prone to freezing prematurely․
Reduce the quantity of the recipe if you’re using a smaller capacity machine․ Overfilling can strain the motor and hinder proper churning․ Consider adding a tablespoon or two of alcohol (vodka or liqueur) to the mixture; alcohol lowers the freezing point‚ resulting in a smoother texture․
If the mixture is already frozen solid‚ unplug the machine and allow it to sit for 15-20 minutes to soften slightly before attempting to remove the dasher and frozen contents․ Do not force the dasher‚ as this could damage the unit;