Williams Wall Heater Manual: A Comprehensive Guide
This manual provides detailed instructions for installation, operation, maintenance, and troubleshooting of Williams wall heaters, covering various models like 3508332 and FO 038145.
Understanding Your Williams Wall Heater
Williams wall heaters are designed to provide efficient and reliable supplemental heat for various spaces, ranging from small cabins to larger rooms. These units utilize natural gas or propane as fuel, offering a cost-effective heating solution. Key components include a burner assembly, a heat exchanger, a fan for air circulation, and a thermostat for temperature control.
Models like the Monterey (3509622A) boast 35,000 BTUH and 66% AFUE, suitable for areas up to 600 sq. ft. Older models (FO 038145/6257731) may require careful inspection due to age. Understanding your specific model number, found on the unit’s label, is crucial for accessing the correct documentation and parts.

Safety First: Important Precautions
Prioritize safety by ensuring proper carbon monoxide detection, adequate ventilation, and regular maintenance of your Williams wall heater to prevent hazards and ensure optimal performance.
Carbon Monoxide Detection
Carbon monoxide (CO) is a colorless, odorless gas that can be deadly; Williams wall heaters, being fuel-burning appliances, potentially produce CO if not functioning correctly. Installing a CO detector is absolutely crucial near the heater and in living areas. Regularly test the detector’s functionality, replacing batteries as needed.
Recognize the symptoms of CO poisoning: headache, dizziness, weakness, nausea, vomiting, chest pain, and confusion. If a CO detector alarms, immediately evacuate the premises and call emergency services. Never ignore a CO alarm! Ensure proper ventilation, as described in this manual, to minimize CO buildup. Regular professional inspections can also help identify and address potential CO risks.
Proper Ventilation
Adequate ventilation is paramount for safe and efficient operation of your Williams wall heater. Fuel-burning appliances require oxygen for combustion and produce exhaust gases. Ensure the venting system – particularly for top-vent models – is unobstructed and functioning correctly. Inspect vents regularly for blockages from debris, bird nests, or corrosion.
Never seal or obstruct air pathways around the heater. Proper airflow ensures complete combustion and prevents the buildup of dangerous gases like carbon monoxide. Cracked or damaged venting must be repaired immediately by a qualified technician. Maintaining sufficient air supply is especially critical in tightly sealed homes. Follow all venting requirements outlined in the installation section.
Regular Maintenance
Consistent maintenance extends the life and ensures the safe operation of your Williams wall heater. Annual inspections by a qualified technician are highly recommended, including burner cleaning and safety control checks; Regularly inspect the venting system for obstructions and corrosion, ensuring proper exhaust flow. Clean the exterior with a damp cloth, avoiding harsh chemicals.
Periodically check the pilot light for a strong, blue flame. A weak or yellow flame indicates potential issues requiring professional attention. Dust the fan blades to maintain efficient airflow. Following these simple steps helps prevent malfunctions and ensures optimal heating performance. Refer to the troubleshooting section for common issues and solutions.
Identifying Your Williams Wall Heater Model
Locating your heater’s model number – such as 3508332, 3508732, or FO 038145 – is crucial for accessing the correct manual and parts.
Locating the Model Number
Finding your Williams wall heater’s model number is the first step towards proper maintenance and repair. This unique identifier unlocks access to specific manuals, parts lists, and troubleshooting guides tailored to your unit. Typically, the model number is found on a metal data plate affixed to the heater’s cabinet.
Look for a silver or black plate, often located inside the unit, near the gas valve or on the back panel. Common model numbers include 3508332, 3508732, 5008732, FO 038145, and 6257731. The plate will clearly display “Model No.” followed by a series of numbers and/or letters. Carefully record this information, as it will be essential when ordering replacement parts or seeking professional assistance.
Common Williams Wall Heater Models (3508332, 3508732, 5008732, FO 038145, 6257731)
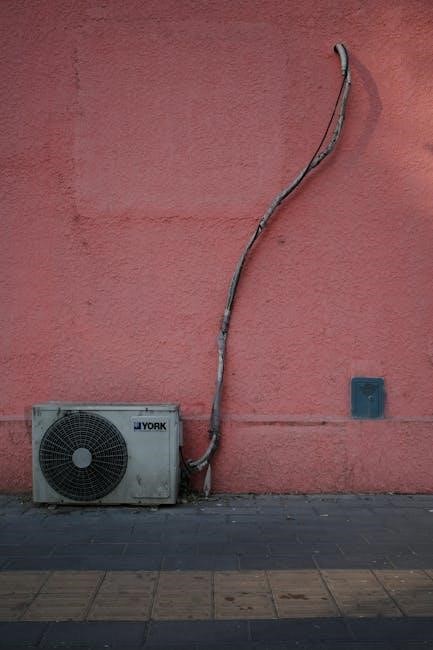
Williams produced a range of wall heaters over the years, with several models frequently encountered. The 3508332, 3508732, and 5008732 are common natural gas units, often found in older homes. Model FO 038145 is an older propane heater, frequently used in cabins or remote locations, similar to the 6257731.
Finding specific documentation for these older models can be challenging, but resources exist online. Variations within these models may exist, so always confirm compatibility before ordering parts. Understanding your specific model is crucial for safe and effective operation and repair. Proper identification ensures you utilize the correct procedures and components.

Installation Guide
Proper installation is critical for safe operation, involving gas line connections, correct venting procedures for top-vent models, and secure electrical connections.
Gas Line Connection
Connecting the gas line requires utmost care and adherence to local codes. Always shut off the gas supply before beginning any work. Use a properly sized gas pipe and approved fittings, applying pipe joint compound suitable for gas lines. Ensure a tight, leak-proof connection to prevent gas escapes, which are extremely dangerous.
A qualified technician should perform this step, verifying the gas type (natural gas or propane) matches the heater’s specifications. Pressure testing the connection with a manometer is crucial to confirm proper operation and safety. Never use excessive force when tightening fittings, as this can damage the gas line. Following these guidelines ensures a secure and safe gas supply to your Williams wall heater.
Venting Requirements (Top-Vent Models)
Proper venting is critical for safe operation of top-vent Williams wall heaters. The vent pipe must be of the correct diameter and material, as specified in the installation instructions, typically B-vent. It should rise vertically with no horizontal runs, ensuring adequate draft to expel combustion gases.
Maintain proper clearances from combustible materials around the vent pipe. Inspect the vent pipe regularly for corrosion, blockages, or damage, replacing it if necessary. Incorrect venting can lead to carbon monoxide buildup, a life-threatening hazard. A professional inspection is recommended to verify compliance with local codes and ensure safe operation of the venting system.
Electrical Connection
Williams wall heaters require a dedicated electrical circuit, adhering to local electrical codes. Before connecting, ensure the power supply matches the heater’s voltage requirements, typically 120V. A properly grounded outlet is essential for safety, preventing electrical shock.
The electrical connection should be made by a qualified electrician, verifying correct wiring and fuse/breaker sizing. Never use extension cords or adapters. Inspect wiring for damage before connecting. Improper electrical connections can cause malfunctions, fire hazards, or damage the heater’s components. Always disconnect power before performing any electrical work.
Operating Instructions
Proper startup involves verifying gas supply, checking the pilot light, and adjusting thermostat settings for desired room temperature and fan operation.
Initial Startup Procedure
Before initiating the heater, ensure the gas supply is fully opened to the appliance. Carefully inspect the venting system for any obstructions, guaranteeing proper exhaust flow. Turn the thermostat to its lowest setting. Locate the gas control valve and follow the manufacturer’s instructions for lighting the pilot light – typically involving pressing and holding a button while igniting.
Once the pilot is established, set the thermostat to your desired temperature. Observe the burner for a stable, blue flame. If the pilot repeatedly extinguishes, or the burner doesn’t ignite, immediately shut off the gas supply and consult a qualified technician. Allow a brief warm-up period before the fan engages, ensuring efficient heat distribution throughout the room.
Thermostat Control Settings
Williams wall heaters typically feature a dial or digital thermostat for precise temperature regulation. Rotating the dial clockwise increases the desired room temperature, while counterclockwise decreases it. Many models offer a range of temperature settings, allowing for customized comfort levels. Some units include a “High” or “Low” fan speed selection, influencing heat distribution intensity.
Experiment with different settings to find the optimal balance between warmth and energy efficiency. Note that the thermostat measures air temperature near the unit, so placement can affect accuracy. Avoid obstructing airflow around the thermostat for consistent performance. Regularly check the thermostat’s calibration for reliable operation.
Fan Operation
The fan within your Williams wall heater is crucial for distributing warm air throughout the room. Most models offer multiple fan speed settings – typically “Low” and “High” – controlled via a switch or the thermostat dial. The “Low” setting provides gentle, consistent warmth, ideal for maintaining a comfortable temperature. “High” delivers rapid heating, useful for quickly warming a cold space.
Ensure the fan operates smoothly and quietly. Unusual noises could indicate debris obstruction or motor issues. Regularly inspect the fan blades for dust accumulation and clean as needed. Proper fan operation is vital for efficient heat circulation and overall heater performance.

Maintenance and Troubleshooting
Regular cleaning of the burner assembly, checking the pilot light, and addressing error codes are essential for safe and efficient Williams wall heater operation.
Cleaning the Burner Assembly
Before cleaning, always disconnect the gas and electrical supply to the Williams wall heater for safety. Carefully remove the burner assembly following the instructions in your specific model’s manual. Use a soft brush and vacuum to remove dust, debris, and any obstructions from the burner ports and combustion chamber.
A clogged burner can lead to inefficient heating and potential safety hazards. Inspect the burner for any signs of corrosion or damage, and replace it if necessary. Ensure all components are thoroughly dry before reassembling. Reinstall the burner assembly securely, and then restore the gas and electrical connections. Proper cleaning ensures optimal performance and longevity of your Williams wall heater.
Checking the Pilot Light
A stable pilot light is crucial for your Williams wall heater’s operation. Locate the pilot light access panel, typically on the lower section of the heater. Follow the manufacturer’s instructions to safely relight the pilot if it’s extinguished – usually involving turning the gas control knob to “Pilot” and pressing the reset button while applying a flame.
Observe the flame; it should be blue and steady. A yellow or flickering flame indicates a potential issue with gas supply or venting. If the pilot light repeatedly goes out, inspect the thermocouple and gas valve. If problems persist, consult a qualified technician for assistance to ensure safe and efficient heating.
Addressing Common Error Codes
Williams wall heaters utilize error codes to diagnose operational issues. While specific codes vary by model, common ones indicate problems with the gas supply, flame sensor, or overheating. Consult your heater’s specific manual for a complete list and their meanings.
Often, a simple reset – turning the unit off and on – can clear temporary errors. However, persistent codes require further investigation. Never attempt repairs yourself if you’re uncomfortable; contact a qualified HVAC technician. Ignoring error codes can lead to unsafe operation or permanent damage to your heating system. Prioritize safety and professional assistance.
Parts and Components
Key components include the burner assembly, fan motor, thermostat, and control board, all vital for efficient and safe operation of your Williams wall heater.
Burner Assembly Details
The burner assembly is the heart of your Williams wall heater, responsible for mixing gas and air to create a controlled flame; Many models, like the Monterey, feature a combustion chamber with a durable ceramic coating designed to extend the lifespan of this critical component. Regular inspection is crucial; look for signs of corrosion, blockage, or damage.
Proper burner function ensures efficient heating and minimizes the production of carbon monoxide. Cleaning the burner assembly regularly, as detailed in the maintenance section, removes dust and debris that can impede airflow and affect combustion. Ensure the gas orifices are clear and unobstructed for optimal performance. A properly maintained burner assembly contributes significantly to the heater’s overall safety and efficiency.
Fan Motor Specifications
The fan motor circulates heated air throughout the room, ensuring even heat distribution. Older Williams propane wall heaters, such as model FO 038145, utilize a fan motor designed for reliable operation, though specific horsepower ratings vary by model. Typically, these motors operate on standard household voltage (120V) and are thermally protected to prevent overheating.
When troubleshooting, checking the fan motor is essential. Ensure it spins freely and isn’t obstructed. A failing motor may produce unusual noises or fail to circulate air effectively. Replacement fan motors should match the original specifications to maintain optimal performance and safety. Always disconnect power before inspecting or replacing the fan motor.
Thermostat and Control Board Overview
The thermostat regulates room temperature, signaling the control board to activate or deactivate the burner. Williams wall heaters employ electromechanical or electronic thermostats, offering adjustable heat settings. The control board manages the entire heating process, including ignition, flame sensing, and safety features.
Understanding the control board’s components is crucial for troubleshooting. It houses relays, sensors, and a gas valve controller. Error codes displayed often pinpoint issues within the control board or its connected components. Replacement control boards must match the heater’s model number for proper functionality and safety. Always consult a qualified technician for control board repairs or replacements.
Repair and Replacement
Locating replacement parts can be challenging for older models; professional service is often recommended for complex repairs or when dealing with gas lines.
Finding Replacement Parts
Sourcing replacement parts for Williams wall heaters, particularly older models like FO 038145 or 6257731, can present difficulties. Original equipment manufacturer (OEM) parts may be discontinued, requiring resourceful searching. Online marketplaces specializing in appliance parts are a good starting point, but verifying compatibility is crucial. Local heating appliance repair shops might stock common components like thermostats or fan motors.
When ordering, always have the complete model number (e.g., 3509622A) readily available to ensure accurate part selection. Consider contacting Williams directly, though support for older units may be limited. For specialized parts, exploring appliance parts retailers or forums dedicated to vintage heating systems could yield results. Prioritize safety and professional installation when replacing gas-related components.
Professional Service Recommendations
For complex repairs or if you’re uncomfortable working with gas lines or electrical connections, engaging a qualified HVAC technician is strongly recommended. Improper servicing can lead to hazardous situations, including gas leaks or carbon monoxide poisoning. A professional can accurately diagnose issues, ensuring safe and effective repairs.
Regular professional maintenance, including burner inspection and safety control checks, extends the heater’s lifespan and optimizes performance. When seeking service, verify the technician’s credentials and experience with Williams wall heaters. They should be familiar with models like the Monterey 3509622A and older propane units (FO 038145). Prioritize certified and insured professionals for peace of mind.
Specific Model Information
Detailed guidance is available for the Williams Monterey (3509622A) and older propane heaters (FO 038145/6257731), addressing unique features and potential issues.
Williams Monterey Top-Vent Wall Heater 35,000 BTUH (3509622A)
The Williams Monterey model 3509622A is a natural gas, top-vent wall heater delivering 35,000 BTUH with a 66% AFUE rating. It’s designed for spaces up to 600 square feet, offering efficient and reliable heating. This unit features a durable combustion chamber with a ceramic coating, extending its lifespan.
Installation requires proper venting, adhering to top-vent specifications. Users should consult the full installation manual for detailed instructions regarding gas line connections and safety precautions. The Home Depot currently lists this model, providing access to questions and answers from other users. Regular maintenance, including burner cleaning, is crucial for optimal performance and longevity.
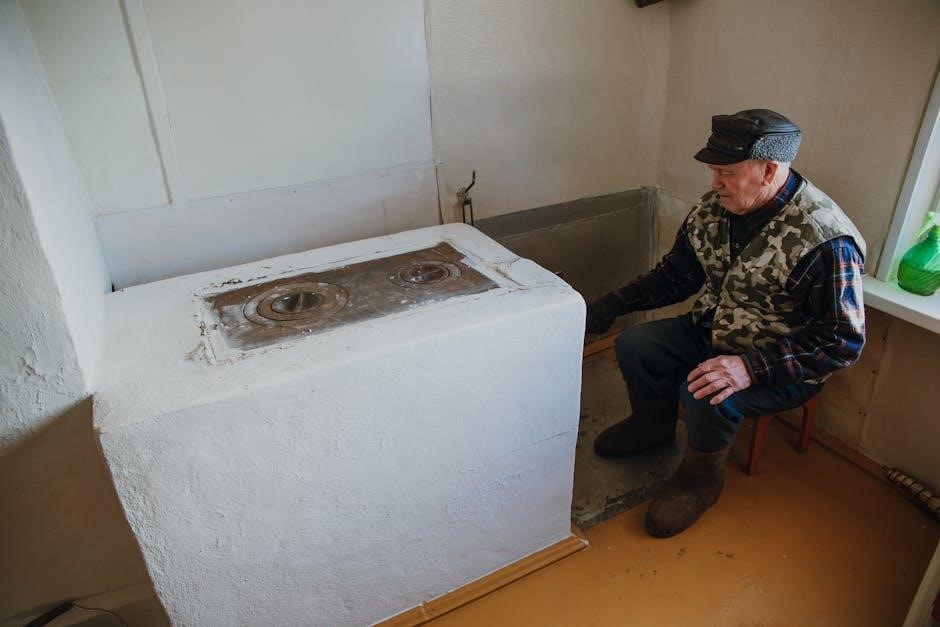
Older Williams Propane Wall Heater (FO 038145/6257731)
Williams propane wall heaters, specifically models FO 038145 and 6257731, present unique challenges due to limited readily available documentation. Owners often find model FO 038145 closely resembles the 6257731, allowing the latter’s manual to be used as a reference. These heaters are frequently found in remote locations, like mountain cabins at elevations around 5200 feet;
Troubleshooting often involves deciphering fan wiring, as specific diagrams are scarce. Due to their age, finding replacement parts can be difficult. Online forums, like DoItYourself.com, are valuable resources for owners seeking advice and shared experiences regarding repair and maintenance of these older units.

BTU and AFUE Ratings Explained
BTU measures heating capacity, with the Monterey model offering 35,000 BTU. AFUE indicates efficiency; a 66 AFUE rating means 66% of fuel becomes heat.
Understanding Heating Capacity (BTU)
British Thermal Units (BTU) are the standard measurement for quantifying heat output. A higher BTU rating signifies a greater heating capacity, enabling the wall heater to warm larger spaces more effectively. The Williams Monterey Top-Vent Wall Heater, for instance, boasts a robust 35,000 BTU output. This capacity is specifically designed to comfortably heat rooms up to approximately 600 square feet.
Determining the appropriate BTU level for your space is crucial for optimal performance and energy efficiency. Factors like room size, insulation quality, and climate conditions all influence the required BTU input. Selecting a heater with an insufficient BTU rating may result in inadequate heating, while an excessively high rating could lead to wasted energy and discomfort.
Annual Fuel Utilization Efficiency (AFUE)
Annual Fuel Utilization Efficiency (AFUE) represents a Williams wall heater’s ability to convert fuel into usable heat, expressed as a percentage. A higher AFUE rating indicates greater efficiency and lower heating costs. The Williams Monterey Top-Vent Wall Heater, model 3509622A, features a commendable 66 AFUE rating. This means that 66% of the fuel consumed is directly transformed into heat for your home, while the remaining 34% is lost during combustion and venting.
Comparing AFUE ratings is essential when selecting a new wall heater. Modern, high-efficiency models often exceed 80% AFUE, offering significant long-term savings on energy bills. Consider the AFUE alongside the BTU rating to find the optimal balance between heating capacity and efficiency for your specific needs.
Warranty Information
Registering your Williams wall heater is crucial for warranty coverage. Details regarding coverage length and specific terms are available upon registration and in the product documentation.
Registering Your Williams Wall Heater
Prompt registration of your new Williams wall heater is highly recommended to validate your warranty and ensure access to important product updates and support. Typically, registration can be completed online through the manufacturer’s official website; You will likely need to provide the model number, serial number, and proof of purchase – such as a receipt or invoice – during the registration process.
Keeping your registration information current is also essential. Should you relocate or change contact details, update your account accordingly. Registering allows Williams to efficiently handle any warranty claims or provide assistance should you encounter issues with your heating appliance. Don’t delay; register today for peace of mind!
Warranty Coverage Details
Williams wall heater warranties generally cover defects in materials and workmanship for a specified period from the date of original purchase. Coverage typically includes parts and, in some cases, labor costs associated with repairing or replacing defective components. However, the warranty often excludes issues arising from improper installation, misuse, neglect, or unauthorized modifications.
Regular maintenance, as outlined in this manual, is usually a condition of warranty validity. Damage caused by power surges, acts of God, or normal wear and tear may also be excluded. Carefully review the full warranty document for specific terms, conditions, limitations, and the process for filing a claim.